The Beginner's Guide to Modding
Episodes 4 - Secret of the Oracle & Episode 5 - The Armageddon Machine |

Introduction I started writing this tutorial when I tried to get custom music to work in my Keen 4 level. However, it grew bigger than I expected and now it's too much to fit into the forum at http://www.keenmodding.org/
If you find any errors or want to see something added just drop me an email. |
Sections 1. What you need to get started 5. Configuring WDC to work with Keen 6. Levels 7. Background Graphics and Sprites 9. Music |
1. What you need to get started Over the years many tools have been developed to make modding Commander Keen games easier. Some of them are for advanced users and some are essential when you want to begin with modding. Here is a list of tool that will help you a lot when you first start your mod.
|
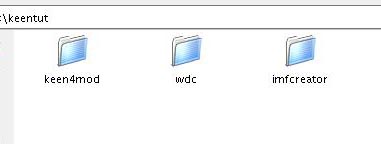
2. Folder Structure I recommend setting up a folder structure like the one below to keep things organized. 1. Create a working directory. For these tutorials mine is called "keentut" 2. Create 3 folders in this directory: "keen4mod" "wdc" and "imfcreator"
3. Inside "keen4mod" create a subfolder called "bmp". This folder will hold all the extracted graphics from Keen 4 4. Inside "wdc" create 3 subfolders: "keen4" "keen4_output" and "keen4_mod_files"
|
3. Installation of Software In this section we will install and configure some tools that are essential for Keen-modding. 1. Run the WDC installer and tell it to install the program into the "wdc" folder 2. Run the IMF-Creator installer and tell it to install into the "imfcreator" folder 3. Copy the files of a fresh (unmodified) Keen 4 into "keen4mod" AND also into "wdc/keen4" - that's right: copy it into both folders. One will be the main folder where the final modded version will be created. The other one is a kind of "working directory" for the program WDC.
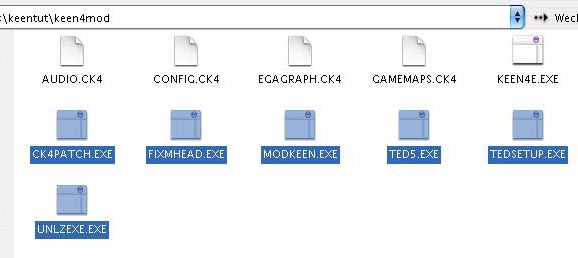
4. From the Galaxy-Modding-Kit copy these 6 files into the main "keen4mod" folder
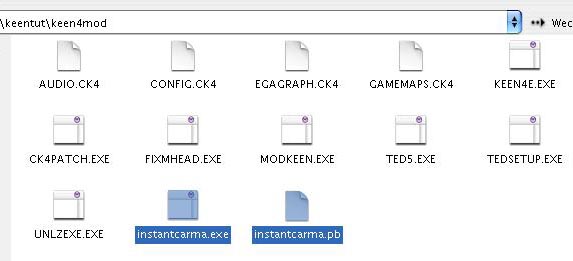
5. From Insta-Carma copy these 2 files into the main "keen4mod" folder
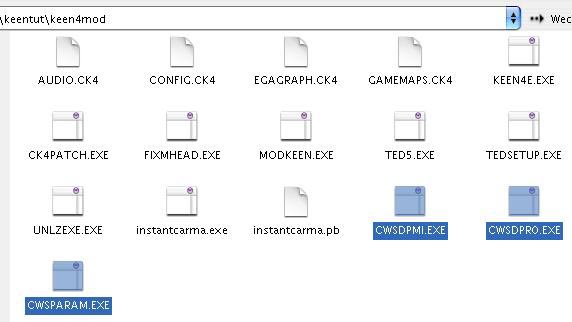
6. (optional): If you want to run ModKeen from within DosBox you need to copy these 3 files from the "BIN" folder inside csdpmi3b.zip into the main "keen4mod" folder
|

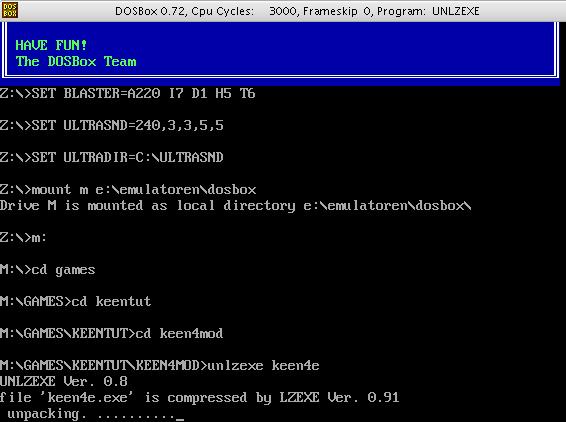
4. Preparing Keen for Modding Now it's time to do the first general modifications to the keen executable. This includes decompressing the executable and setting up some additional files. 1. Run DosBox and navigate to the main "keen4mod" folder. 2. Type unlzexe keen4e (if you are working with Keen 5 type unlzexe keen5e) and wait for the process to finish.
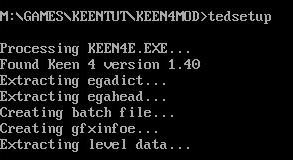
3. Next, type tedsetup and wait for the process to finish
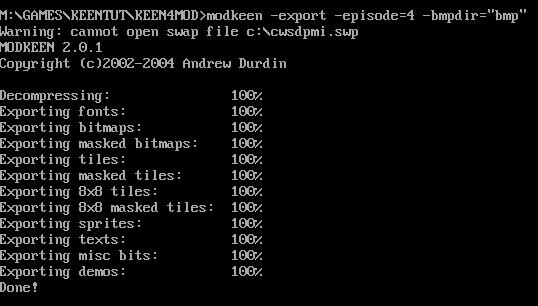
4. Type modkeen -export -episode=4 -bmpdir="bmp" and wait for the process to finish (replace the 4 with a 5 if you are working with Keen 5)
5. Type tedsetup and wait for the process to finish. 6. Type ted5 to start the level editor once. This will create additional files in our "keen4mod" folder. It will load the world map of Keen 4. However, we don't need to make any changes right now so quit the editor again by pressing Alt+X 7. Leave DosBox open but using Alt+Tab switch to your "keen4mod" folder. 8. Run the file instantcarma.exe and press "Done" when it has finished.
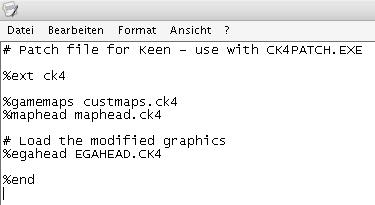
# Load the modified graphics
Save the file and close it again. 10. Using Alt+Tab again switch back to DosBox and type go4 (Type go5 if you're working with Keen 5) 11. You should now be able to play the game as if it was an unmodified original Keen 4. Press Ctrl+Q to quit the game. 12. Quit DosBox for now. |
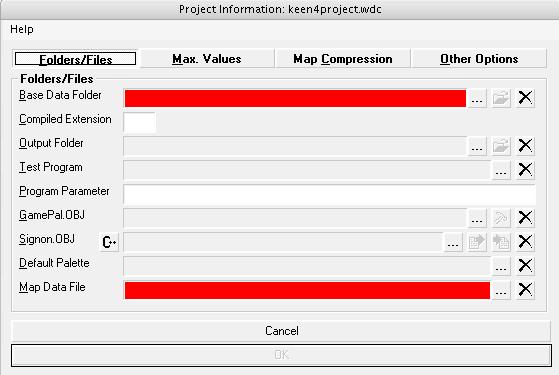
5. Configuring WDC to work with Keen WDC is a great modding application which was originally written for Wolfenstein 3D. However, over the years it has gained more and more Keen compability and now it is a great program to modify music and sound effects for Commander Keen games. 1. If you followed the steps in section 1-4 above you should have a second clean copy of Keen 4 installed in the "keen4" subfolder of "wdc" and you should also have a "keen4_output" folder as well as a "keen4_mod_files" folder. Now lets configure WDC to work with these files. 2. Start WDC and click File -> New Project 3. Enter 'keen4project' as the project name and click Save.
4. In the next window set the "Base Data Folder" to the "keen4" subfolder in the "wdc" directory. 5. Set the "Output folder" to the "keen4_output" subfolder in the "wdc" directory. 6. Click the button "Other Options" and activate: "Use Tile 16s for maps, if they exist" 7. Now click "OK" and wait for WDC to load the project for the first time. When it's done you should see the Keen 4 world map in the main window. Everything is now setup and you can start to modify levels, sprites, sound effects and music. |
6. Levels Of course you want to create your own levels for your Commander Keen adventure. You can modify existing levels or create new ones from scratch. 1. Run DosBox and navigate to your main "keen4mod" folder 2. Type ted5 to start the level editor
3. By default the world map is loaded. You can start editing and modifying it right away. 4. If you want to start a level from scratch you need to delete one of the existing level files. Just click on File -> Delete Map and delete any level you like.
5. After you have finished editing your maps you can close TED5 6. Leave DosBox open and - using Alt+Tab -switch to your "keen4mod" folder 7. Run the file instantcarma.exe and press "Done" when it's finished 8. Using Alt+Tab again switch back to DosBox and type go4
|
7. Background Graphics and Sprites You may remember that we extracted all the graphics out of the game using ModKeen. They are now in the "bmp" folder in the main "keen4mod" directory. These graphics include
Basically you can modify each and every file in this folder. For example open '4BMP0103.BMP' to edit the welcome screen backdrop. Visit http://www.keenmodding.org/ to find tutorials on how to deal with some of the special files in here - such as the ASCII screens.
1. Open DosBox and navigate to your main "keen4mod" folder. 2. Type the following: modkeen -import -episode=4 -bmpdir="bmp" (change the 4 to a 5 if you are working with Keen 5) 3. After the process has finished you can type go4 to launch the game and feast your eyes on the new graphics.
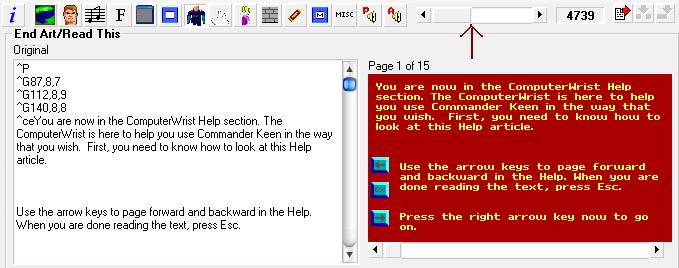
Just load your "keen4project" in WDC and click on View -> End Art
Then press the hammer icon in the middle of window, save the file in your "keen4_mod_files" folder and now you can conveniently edit it in a new window. All changes are represented visually. When you're done with editing click "OK" Now close WDC and copy the TXT file you just created from your "wdc/keen4_mod_files" folder into the "keen4mod/bmp" folder. You'll have to manually find the corresponding TXT file that you want to replace. Write down its filename, delete it and rename the file you just created in WDC to that of the one you just deleted ... sounds complicated but in essence you just replace the new file with the old one. As a last step import the "bmp" folder back into the executable using ModKeen (see steps 1-3 in this section) |
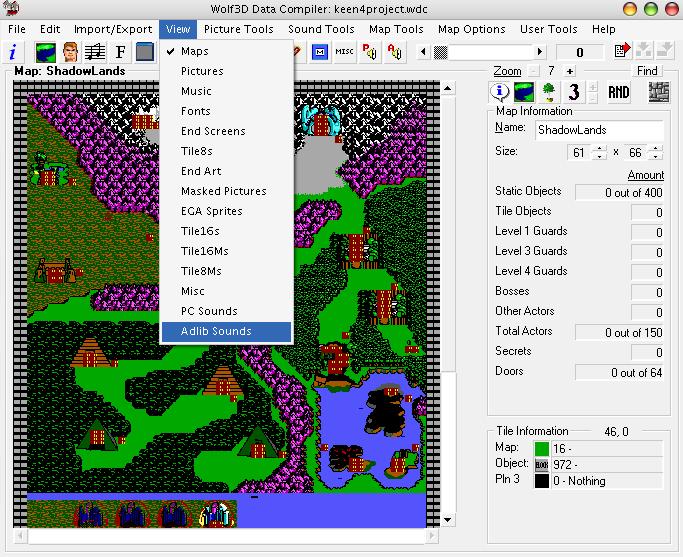
8. Sound Effects 1. Open WDC and load "keen4project". 2. Click View -> Adlib Sounds
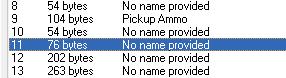
3. Click on the different entries in the list to hear a short preview 4. If you identify a sound (i.e. sound 9 in Keen 4 is the sound that plays when you pick up ammo) you can right click the list entry and change the name for easy identification.
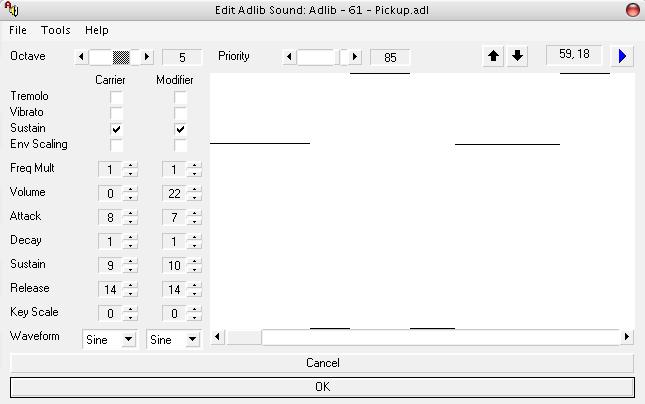
5. Let's just use that very "pickup ammo" sound 9 in the list and change it's 'melody'. 6. Highlight the list entry for sound 9. Then click the little hammer in the bottom right corner of the window.
7. WDC asks you where to export the current sound file. Choose the "keen4_mod_files" folder and click "Save". 8. WDC opens its in-built adlib sound editor. Yes, this is VERY simplistic but the ID-team managed to get some great sounds out of it. 9. I can't really give you instructions on how to modify the sound effects because it's a lot of trial and error. Just play with all the settings and use the blue "play" button in the top right corner to preview your sound.
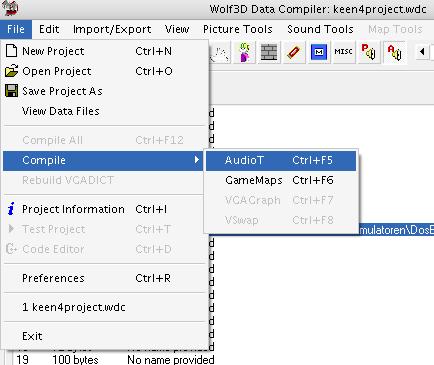
10. When you're done with editing press "OK". You'll see that WDC automatically uses your new version as a replacement for the original one. 11. If you want to throw your edited version out of the window and use the original file again just highlight the entry and click on the black "X" at the very bottom right corner of the window. 12. To add your modified sound effects to Keen 4 click File -> Compile -> AudioT and when it's finished press "Done".
13. Now you can quit WDC and change to your "keen4_output" subfolder 14. Copy the following 3 files from "keen4_output" to your main "keen4mod" folder (you have to overwirte the original files)
15. Now start DosBox again, navigate to your main "keen4mod" folder and type go4 16. In the game pick up ammo and you will hear your new modified sound.
|
9. Music Music in Keen 4-6 is stored in so called IMF files. In this part of the tutorial I'll show you how you can use a standard MIDI file to replace the map music of Keen 4. This section would not've been possible without the knowledge of keenmodding.org's member "Zero X. Diamond". Thank you for all your hard work! 1. Find or make yourself a nice midi file. For this tutorial I use this example file 2. Copy the midi file into your "imfcreator" folder 3. Start IMFCreator
5. Other options can be changed but are not necessary
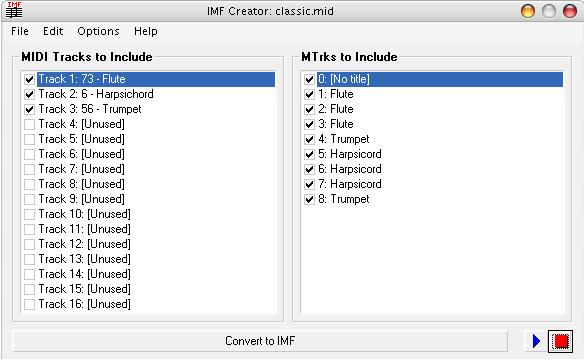
6. Load your midi file into IMFCreator
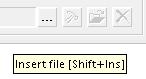
7. If you want to exclude an instrument track from the IMF file just deactivate its entry in the "midi track" list 8. You can preview your song with the blue "Play" button in the bottom right corner 9. When you're happy with your settings press "Convert to IMF" at the bottom of the window 10. Save the IMF file to your "wdc" -> "keen4_mod_files" folder and close IMFCreator 11. Open WDC and load your "keen4project" 12. In the menu click View -> Music 13. You see a list of songs that is available in the game. Highlight the entries to play a preview of the song 14. Find the song that plays on the world map in Keen 4 (in my version it's song 0) and highlight it in the list. 15. Now click on the [...] button in the bottom right corner of the screen to load a replacement file
16. Navigate to the "keen4_mod_files" folder and load the IMF you created just a minute ago 17. Now when you click on the blue "Play" butten with the little 'R' inscribed in it you will hear your replacement music play. 18. If you are happy with your arrangement click File -> Compile -> AudioT and when it's finished press "Done" 13. Now you can quit WDC and change to your "keen4_output" subfolder 14. Copy the following 3 files from "keen4_output" to your main "keen4mod" (you have to overwirte the original files)
15. Now start DosBox again, navigate to your main "keen4mod" folder and type go4 16. As soon as you enter the world map in the game you should hear your new custom music play in the background
|
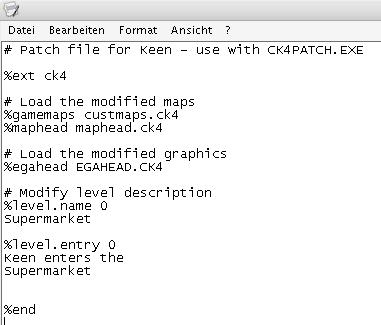
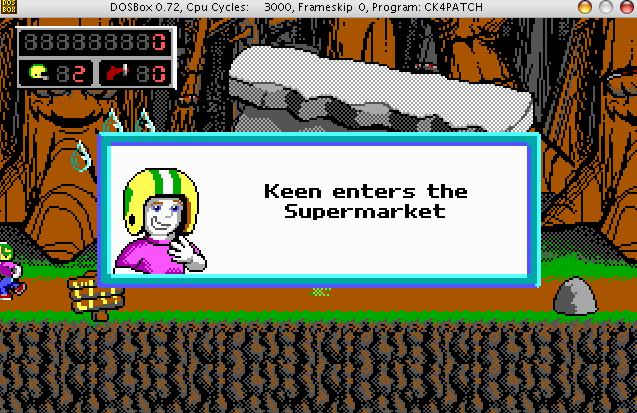
10. Editing Level Names and in-game Messages Modifying in-game messages like "Keen enters Border Village" are accomplished via so-called 'patches'. A patch is one or a few lines of code that are loaded with the game and modify its behaviour. However, changing level names and level entry messages (like "Keen enters Border Village") is a special case because CKPatch uses a special command to do that. Let's learn how that is done.
1. Find out the number of the level of which you want to change the name. To do that open TED5 and look at the level list. 0 is the world map ("Shadowlands" in the case of Keen 4). The level names in TED5 are just internal names and are not used in the game. So changing them here has no effect on the game. 2. Close TED5 and DosBox. In the main "keen4mod" directory find the file called PATCH4.PAT - right click on it and choose "Open with..." Use Wordpad or the Windows text editor to open the file. 3. Enter the following lines #Modify level name The # in front of the first line indicates that it is just a comment to keep things organized. It is not interpreted by the script parser. Now enter the following lines %level.entry 0
Now save and close PATCH4.PAT, run DosBox, navigate to your "keen4mod" folder and type go4
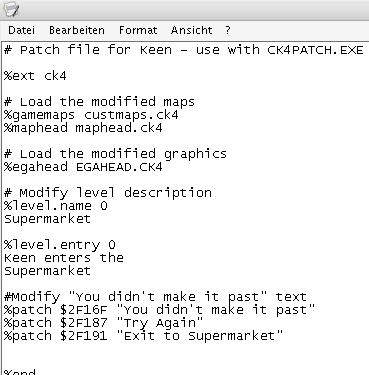
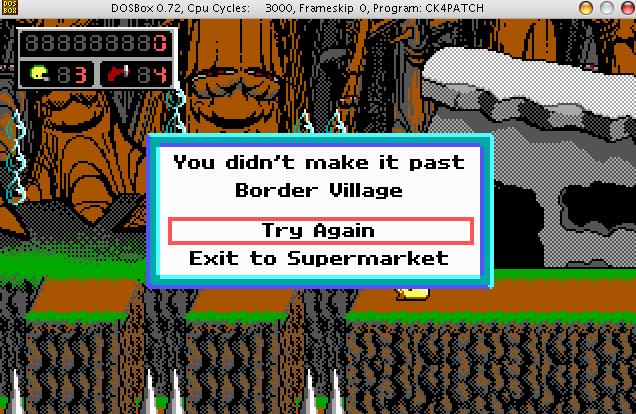
1. A quick search in the forums at http://www.keenmodding.org/ gives me a a few lines of patch code: #Modify "You didn't make it past" text 2. Just insert these lines into PATCH4.PAT as you did before
3.Let's have a look at the results in game. Works like a charm.
|
11. Editing Enemy behaviour Some users at http://www.keenmodding.org/ are very active and search for patches that change enemy behaviour or general behaviour of the game (i.e. gravity settings). I haven't tried any of them yet, but basically it works like I described in the section "Modifying Level Names". 1. Look through the forums to find the patch that suits you 2. Copy the lines of patch code and insert them into PATCH4.PAT (look at section 10 to see how that is done) 3. Run the game via DosBox and go4 and see the results of the patch in the game. 4. If you're not happy with the results of a patch simply remove the corresponding lines from PATCH4.PAT and the original behaviour is restored. |
12. Contact and Legal Stuff You may contact me via e-mail: der_coole_zauberer @t hotmail.com All Commander Keen pictures on this site are copyright of Apogee and ID software. |